Import Ledger
- Navigate to Utilities:
- Open the Utilities menu.
- Click on Import/Export.
Import/Export Functionality
This feature allows you to:
- Export Data: Save product details from the system into a designated folder for external use.
- Import Data: Upload product details from external files into the system.
Save Location
Ensure the files are saved in the specified folder for consistency.
Step-by-Step Import Ledger Master
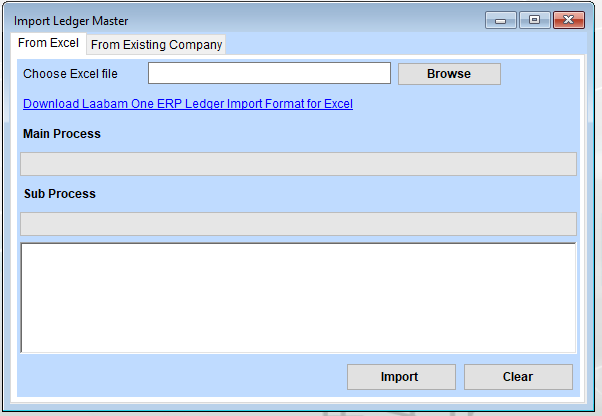
Option 1: Importing from Excel
Prepare the Excel File
- Click the link provided: “Download [ERP Name] Ledger Import Format for Excel.”
- Open the downloaded file and populate it with the ledger details:
- Ensure all required fields (e.g., ledger name, group, balance) are filled in as per the format.
- Save the file on your system once completed.
Upload the Excel File
- Click the “Browse” button to select the prepared Excel file from your computer.
- Ensure the correct file is chosen before proceeding.
Select Main and Sub Processes (If Required)
If applicable, specify the Main Process and Sub Process fields. These may define the type of data being imported or its categorization within the system.
Import the Data
- Click the “Import” button to upload the ledger data.
- Wait for the system to process the file. If there are any errors, the system will display error messages or logs.
Verify the Imported Data
After successful import, check the ledger master or reports to ensure the data has been added correctly.
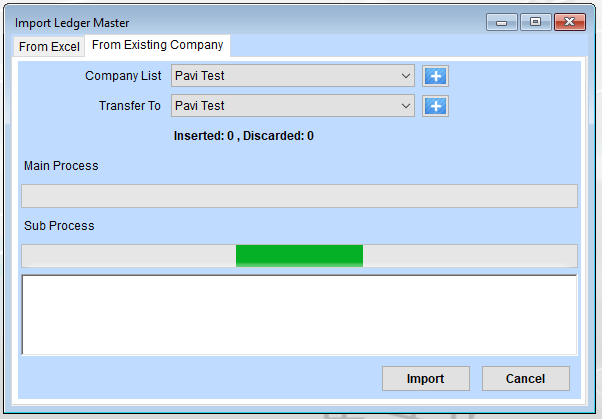
Importing from an Existing Company
Switch to the “From Existing Company” Tab
If you’re importing ledgers from a different company already set up in the ERP system, switch to the second tab.
Select Source Company
- Choose the company list and transfer to the desired company.
Choose Main and Sub Processes
Specify the processes as needed (optional).
Import the Data
Click the “Import” button, and the ledgers from the source company will be copied.
Validate the Imported Data
As with Excel imports, verify that all data has been imported correctly into the new company.
Clear Option
Click the “Clear” button to reset all fields and selections if you need to start over.