Steps for Exporting Using the Export Ledger Book Interface
Select the Tab
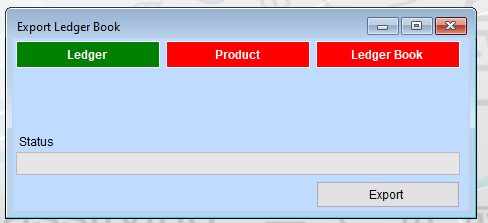
There are three tabs at the top. Click on the appropriate tab based on what you want to export:
- Ledger (Green): Likely used for exporting ledger-related financial data.
- Product (Red): Likely for exporting product-related data.
- Ledger Book (Red): Likely for exporting detailed or combined ledger book data.
Check the Status Section
The “Status” area, which is currently blank, might show updates or progress messages during the export process.
Initiate the Export
- Click the Export button at the bottom-right corner to start the export process.
- A dialog box might appear asking you to:
- Specify the file format (e.g., Excel, PDF, or CSV).
- Choose a save location on your computer.
Monitor the Status
As the export proceeds, any progress or error messages might be displayed in the “Status” section.
Verify the Exported File
Open the exported file from its saved location to ensure it contains the expected data.
Close the Dialog (if needed)
Once the export is complete, click the close (X) button in the top-right corner of the window.