Payment
Step-by-Step Guide for Outward Payment
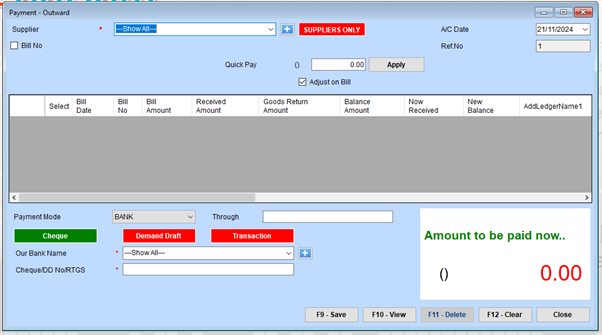
1. Select Supplier
Use the dropdown menu under Supplier to choose the supplier for whom the payment is being made.
- If you need to narrow down the list to only supplier accounts, click the SUPPLIERS ONLY button.
- Use the + (Add) button next to the dropdown to add a new supplier if not listed.
2. Add Reference and Date
- Enter the Ref. No to uniquely identify this payment transaction.
- Specify the A/C Date for when the payment is recorded.
3. Select Bills (if applicable)
If this payment is related to specific bills:
- Tick Bill No and select the relevant bill(s) from the list. The bill details, including date, amount, and balance, will populate the table.
- Use the Adjust on Bill checkbox if the payment should automatically reconcile against pending balances.
4. Quick Pay Option
For a direct payment without selecting bills:
- Enter the amount in the Quick Pay field and click Apply.
5. Payment Details
In the Payment Mode dropdown, choose the method of payment:
- Bank: Payments through bank accounts.
- Cheque: Payments made via cheque.
- Demand Draft or Transaction for other payment types.
Fill out additional fields:
- Through: Specify the transaction channel (e.g., bank branch or online portal).
- Our Bank Name: Select the bank from which the payment will be made.
- Cheque/DD No/RTGS: Enter the cheque number or reference number for the transaction.
6. Verify Payment Summary
Check the Amount to be paid now displayed in green at the bottom right. Ensure the amount matches the intended payment.
7. Save or Modify Entries
- Click F10 - View to review the details of the payment entry.
- Once confirmed, click F9 - Save to finalize the transaction.
- If you need to delete an entry, use F11 - Delete.
- To clear all current inputs and reset the form, click F12 - Clear.