Deleting Ledgers
Step 1: Load Ledgers
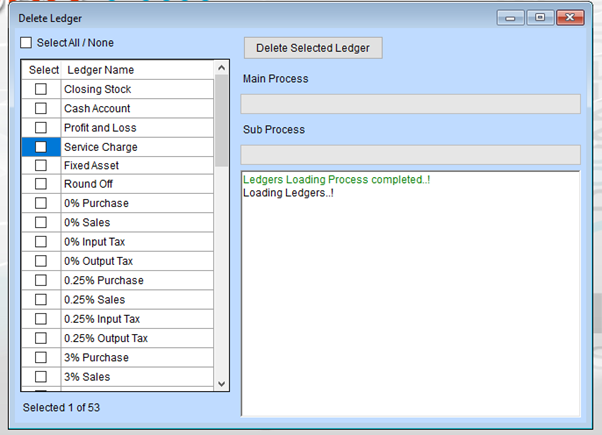
- Ensure the ledgers are loaded into the interface.
- Look for the message “Ledgers Loading Process completed.! Loading Ledgers.!” in the status area to confirm the ledgers are ready for selection.
Step 2: Select Ledgers to Delete
Individual Selection:
- In the “Select” column, check the boxes next to the ledger(s) you want to delete.
- Example: Click the checkbox next to “Service Charge” or others as needed.
Select All/None:
- If you want to delete all the ledgers, check the “Select All / None” box at the top of the list to select all ledgers in one click.
Verify Your Selection:
- Look at the bottom of the list for the “Selected X of Y” text (e.g., Selected 1 of 53) to confirm how many ledgers have been selected.
Step 3: Review Main and Sub Process Fields (Optional)
Main Process/Sub Process:
- If your system requires categorization, you may input relevant details in these fields before deletion.
- If not applicable, leave these fields blank.
Step 4: Delete Selected Ledgers
- Once you’ve selected the ledger(s) to delete, click the “Delete Selected Ledger” button at the top.
- Confirm the deletion action if a pop-up confirmation dialog appears (this depends on system configuration).
Step 5: Monitor Status
- After clicking the “Delete Selected Ledger” button:
- Look at the status box under “Sub Process” to track the progress or completion of the deletion process.
- Ensure the message confirms the successful deletion or highlights any issues/errors.