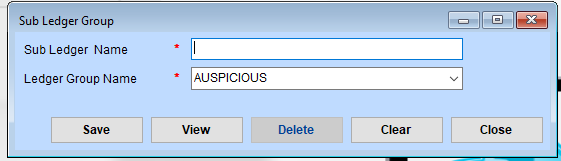
Sub Ledger Group :
1. Adding a New Sub Ledger Group
Access the Sub Ledger Group Module
Navigate to the Sub Ledger Group module.
Enter the Sub Ledger Details
- Sub Ledger Name: Enter a unique name for the sub-ledger group (e.g., “Electricity Expenses,” “Employee Advances”).
- Ledger Group Name: Select the corresponding ledger group from the dropdown menu (e.g., “Expenses,” “Income,” “Assets”).
The pre-selected ledger group (e.g., “AUSPICIOUS”) should be verified or changed as needed.
Save the Sub Ledger Group
Click the Save button to save the new sub-ledger group.
A confirmation message will appear once the record is successfully saved.
2. Viewing Existing Sub Ledger Groups
Click on the View Button
Use the View button to display a list of all saved sub-ledger groups.
Search for Specific Records
Use search filters such as Sub Ledger Name or Ledger Group Name to find a particular sub-ledger group.
Open the Record
Select a sub-ledger group from the list to view or edit its details.
3. Editing a Sub Ledger Group
Locate the Sub Ledger Group
Use the View feature to find the sub-ledger group you want to edit.
Update Information
Modify the Sub Ledger Name or change the Ledger Group Name as necessary.
Save Changes
Click the Save button to apply the updates.
Ensure all mandatory fields (marked with *) are completed before saving.
4. Deleting a Sub Ledger Group
Find the Sub Ledger Group to Delete
Use the View button to locate the sub-ledger group.
Delete the Record
Select the desired sub-ledger group and click the Delete button.
Confirm the deletion in the prompt that appears.
Note: Deleting a sub-ledger group is permanent and cannot be undone.
5. Clearing Input Fields
Reset the Form
To clear all input fields for a fresh entry, click the Clear button.
6. Closing the Module
Exit the Sub Ledger Group Module
Click the Close button to return to the main menu or previous screen.