Supplier Master :
1. Enter Supplier Details
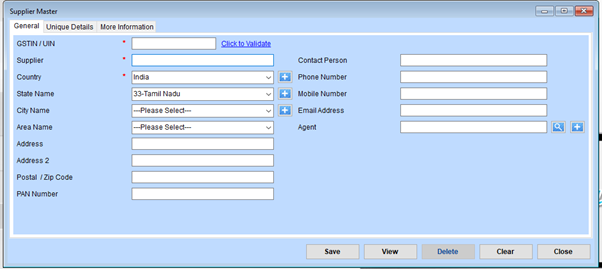
- GSTIN/UIN: Enter the supplier’s GSTIN or Unique Identification Number in the provided field.
Click the “Click to Validate” link to check the validity of the entered GSTIN. - Supplier Name: Fill in the supplier’s full name or business name in the “Supplier” field. This is a required field.
- Country: Choose the supplier’s country from the dropdown menu. By default, “India” is selected.
- State Name: Select the appropriate state from the dropdown. For example, “33-Tamil Nadu.”
You can add a new state by clicking the ”+” icon next to the dropdown. - City Name: Choose the supplier’s city from the dropdown.
Use the ”+” icon to add a new city if it is not listed. - Area Name: Select the area where the supplier operates.
Click the ”+” icon to add a new area if needed. - Address Fields: Enter the supplier’s full address in the Address and Address 2 fields.
- Postal/Zip Code: Provide the supplier’s postal or zip code.
- PAN Number: Enter the supplier’s Permanent Account Number (PAN), if applicable.
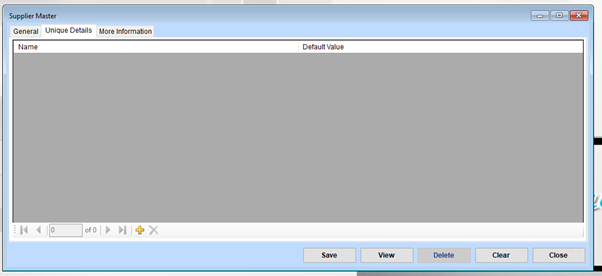
1. Add Supplier Details
- Add New Supplier: Click the ”+” (Add) button at the bottom of the grid to add a new supplier entry.
A new row will appear in the grid. Enter the supplier’s details in the Name and Default Value columns.
2. Save Supplier Information
After filling in the details, click the Save button at the bottom of the form to save the information.
Ensure all fields are completed accurately before saving.
3. View Existing Suppliers
Click the View button to see the list of all saved suppliers.
4. Delete a Supplier
To delete a supplier:
- Select the row of the supplier you wish to remove in the grid.
- Click the Delete button to remove the selected supplier.
- Confirm the deletion if prompted.
5. Clear the Form
To reset the form and remove unsaved changes, click the Clear button. This will revert the form to its default state.
6. Close the Form
Click the Close button when finished to exit the Supplier Master interface.
Navigate to the Barcode Section
- Open the Supplier Master window.
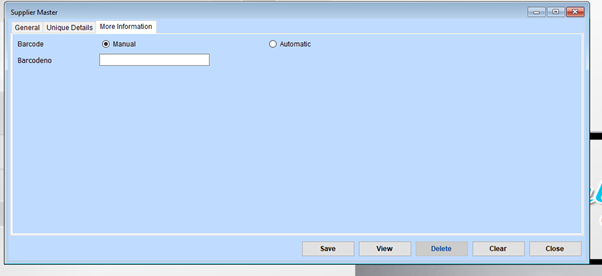
- Go to the More Information tab to configure barcode settings.
Choose Barcode Type
- Select Manual if you want to enter a custom barcode number.
- Select Automatic if the system should generate the barcode number for you.
Input Barcode Number (For Manual Option)
If you select Manual, enter the desired barcode number in the Barcodeno field.
Save Your Changes
Click Save to store the barcode settings for the supplier.
To review all entered information, click View.
Additional Options
- Delete: Use the Delete button to remove an existing entry.
- Clear: Click the Clear button to reset the form fields.
- Close: Click the Close button to exit the window once finished.